
This project came about for two reasons. Firstly, I wanted to try making stained glass, but more importantly, having recently completed the Kitchen, there was a gap that needed filling above the refrigerator, between it and the cupboard above.
Realizing that there would be significant time investment in making the panel (it's about 3 sq ft, and I've never done anything with glass before) and given its obscure height to width ratio, I preferred not using, and could not in fact find an existing design to follow.
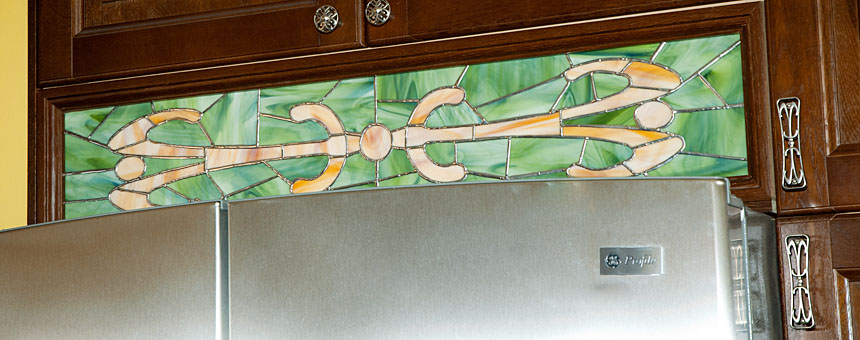
Below is the completed panel, installed. The design of the glass panel follows the design on the cabinet handles (to the right of the panel). Jo, my wife, chose the glass color scheme to match the rest of the decor.
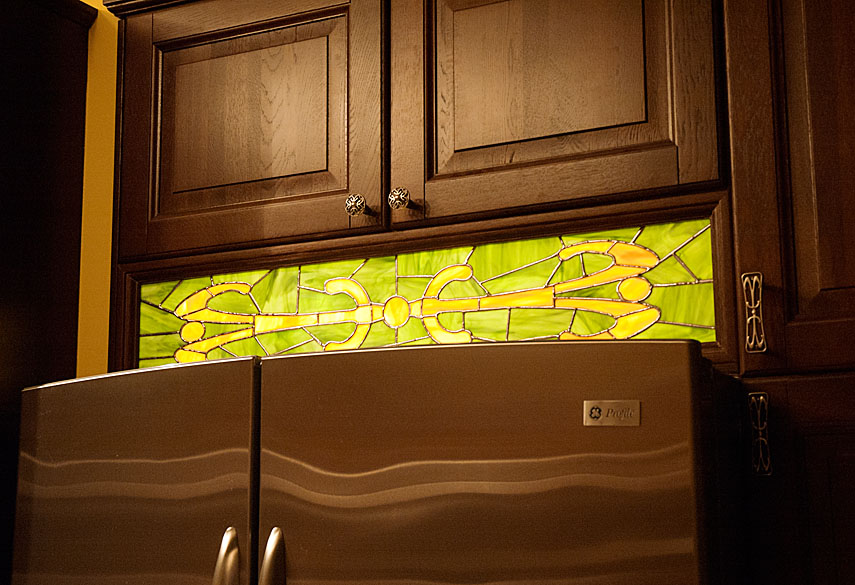
And at night, due to back lighting, it takes on a different appearance. A couple of LED bulbs behind the panel produce almost no heat and stay on all night, serving as a night-light for the kitchen.
This isn't a tutorial on how to do stained glass, I'm hardly qualified to do that and there are plenty of sites and videos explaining the process online. This is just a diary of my experiences.
First, I read a lot and learned a few things about stained glass. There are a few decisions to make before starting any piece, and for this project I chose to use the Tiffany method of copper tape edging instead of using heavier pieces of lead came. The Tiffany way is more suitable for lamps, jewelry boxes etc, whereas the lead came method is more suitable for church windows - but there are no hard rules. I also chose to avoid using lead-based solder.
I would have had to buy a diamond glass grinder but I already had one due to an earlier project involving onyx tiles. I did have to buy copper tape, 4 sheets (12" x 12") of stained glass (two of each color), lead-free solder, a pistol grip glass cutter, a small bottle of light machine oil, a bigger soldering iron than one I use for electronics, a soldering iron heat controller, flux, a small plastic tool that assists with applying the copper tape, a pliers-like tool that helps snap glass, a box of cork pins, and a couple of cork boards to make the piece on.
Whilst awaiting for all that to arrive from magical internet suppliers, I set out making the pattern.
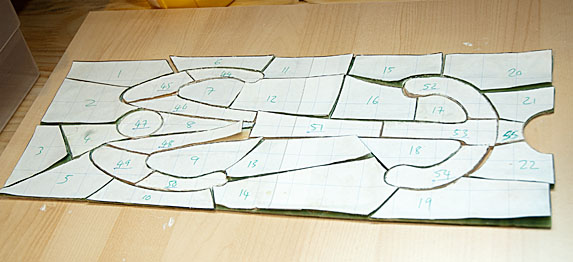
I printed the pattern couple of different ways, and although there are faster methods, I decided to cut out one of them and glue-stick each piece to the glass... numbering them so I could re-assemble the jigsaw at the end.
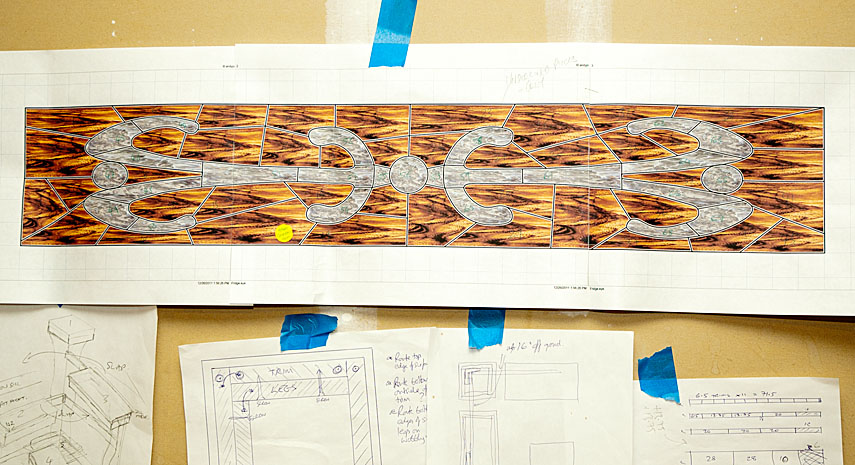
I hung one reference pattern (it has matching numbered pieces, you just can't see that in the picture) on my planning wall above the cutting desk. For a design with 60+ pieces, this was an essential reference. I'm certain there are a lot of skilled glass designers that would have done a much better job of deciding on the shape of each piece. I did made some rookie mistakes (like concave curves) that made construction for a first-timer trickier than it needed to be, but the decision not to make it fully symmetrical in either axis (other than if you consider just the yellow areas vs the green, then it is) was mine. Symmetry is unnatural.

Cutting glass is actually far easier than most people think. Just watch some of the many YouTube videos that show how its done, get some glass, and do it. It's easy.
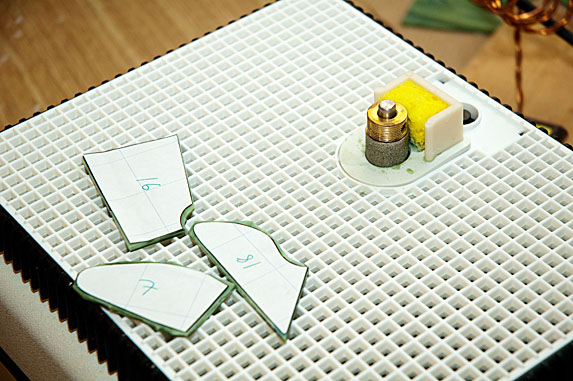
My early pieces (here on the grinder) resulted from cuts that were too conservative which lead to more grinding to get to the desired shape. By the time I did the second half of the panel, I found lots of edges were cut accurately enough to require no grinding at all.
The grinder, a fairly essential piece of equipment, is a wet grinder. It is very quiet and makes almost no dust (I did however use a mask, and didn't grind or cut glass inside the house because glass dust isn't healthy).
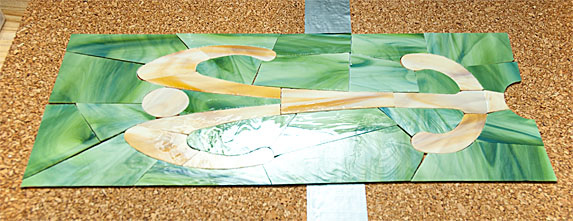
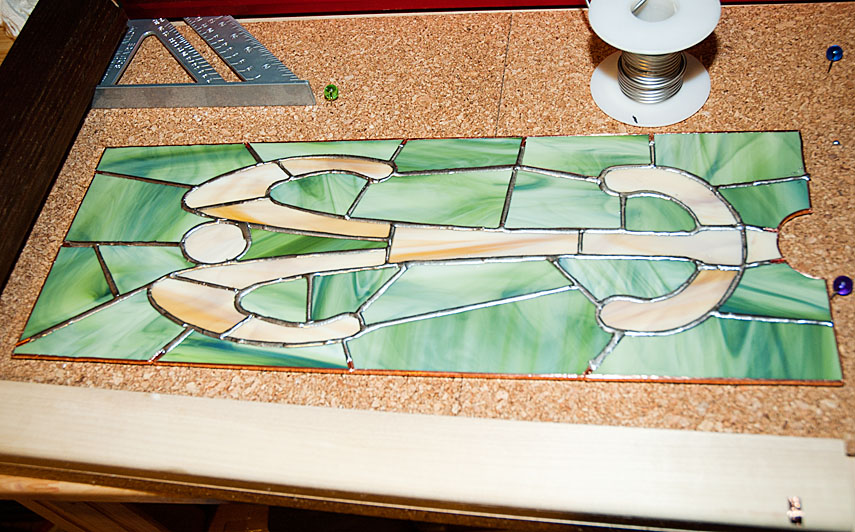
Here are the all the cut pieces from one side of the panel. I decided to make it in two halves so I could handle it more easily. When I was ready, I peeled the paper off, cleaned each piece in water to remove any glue-stick residue and dried glass dust.
Next job was to apply the copper tape. The copper tape comes in various widths and finishes including being able to choose the color of the adhesive side which can be seen when using transparent glass. I used the most common size with black backing, not that it would show.
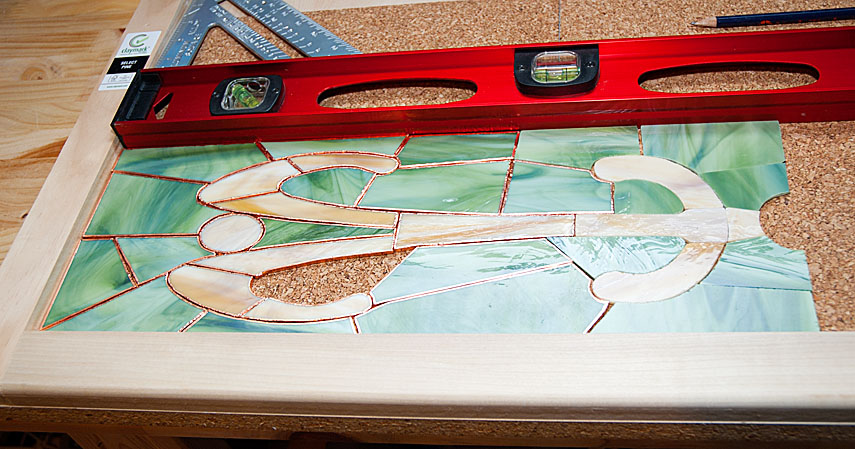
By this stage in the construction I had decided I needed to build a small jig to ensure the pieces would connect to form a straight, and true shape - a flat rectangle. Two bits of 2x1 attached to a very flat particle board to which I had glued cork board did the trick. A square and spirit level came in handy too.
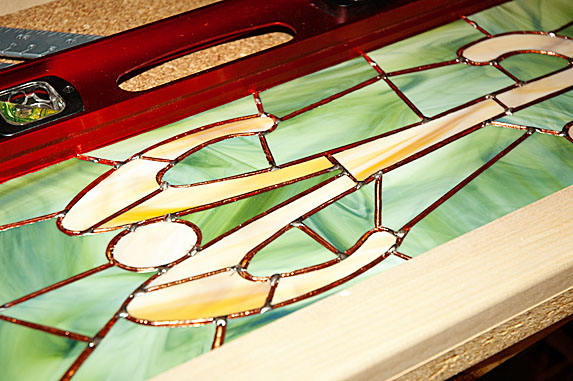
Here, all the pieces have had their copper edging applied.
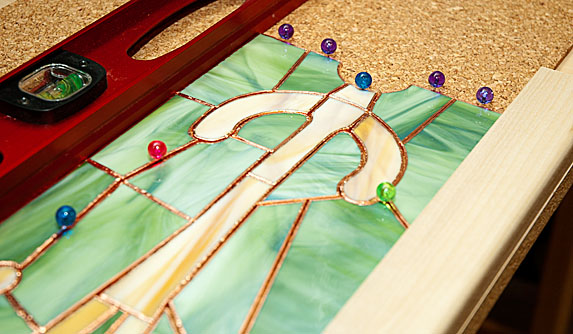
Pins into the cork board help position the pieces and any gaps evenly prior to soldering.
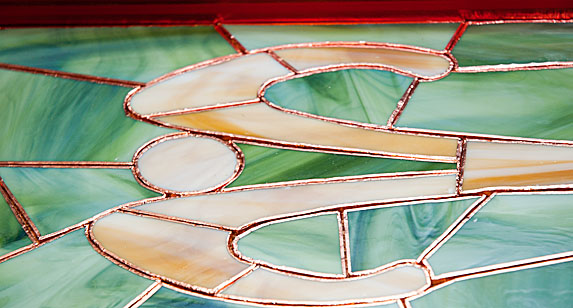
Before final soldering, each vertex is soldered to fix the pieces in place. Flux is applied to the copper immediately before soldering to allow the solder to adhere properly.
Once the front and back are soldered fully, a quick wash and it's ready to mount. Rinse & repeat for the second half, and then solder the two halves together.
For my first attempt, I was really pleased with the result. A few things might have made it better - not using lead-free solder apparently makes it much easier to get decent looking joints (mine are 'rustic') because the leaded solder doesn't solidify quite as quickly, and melts at a cooler temperature. I'm certain practice helps too.
I had plenty of glass and copper tape left over, but surprisingly consumed half a pound of solder which was all I had purchased, and I still needed a little more to finish it.
I'd also avoid using a design with curves. Curves are quite achievable, but they just slow everything down... getting two curved pieces to fit snugly isn't as easy as doing the same with two straight edges.