
I have Pintrest to blame for this project. I saw a photo of an awesome looking set of plant boxes and quickly identified a location that I could build something very similar. My version is less attractive than the original (which had better symetry; I had fence posts height / grow space restrictions - my intention was to grow herbs, not flowers).
My only considerations for this project were to use Cedar, a naturally rot and insect resistant wood, to provide good drainage for the soil in the boxes, and not to overload the fence structure.
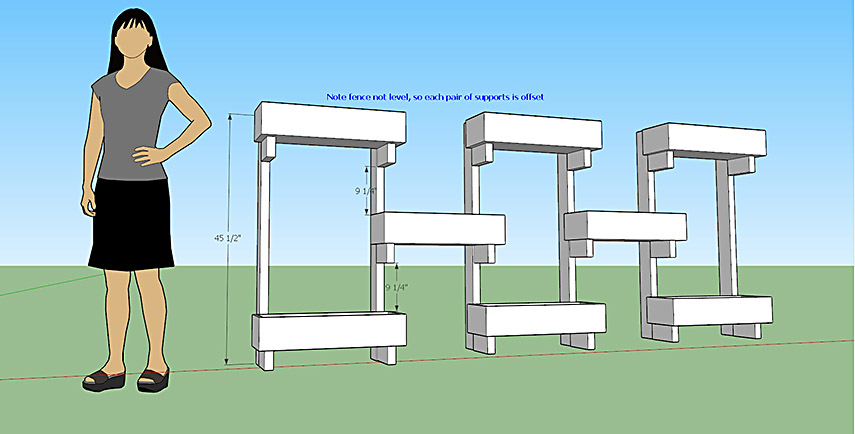
I used Google Sketchup to design the support structure and layout the box pattern. Faceless grey lady for scale. The blue note on the design relates to the fact the fence isn't level, so the boxes were staggered to follow the drop but stay level for each box. There are four components to this item.
- Six vertical 2x4's used to bridge the gap between the fence and the boxes.
- The boxes.
- Two tapered 2x4 supports under each box.
- The fence (or wall) to attach it to.
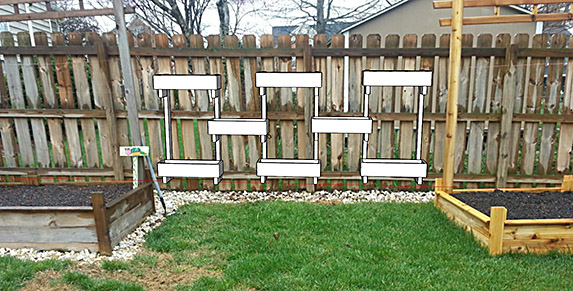
A useful feature of Sketchup allows you to see how the design might look in-situe. Here I just wanted to make sure we could reach the boxes for maintenance, harvesting and watering.
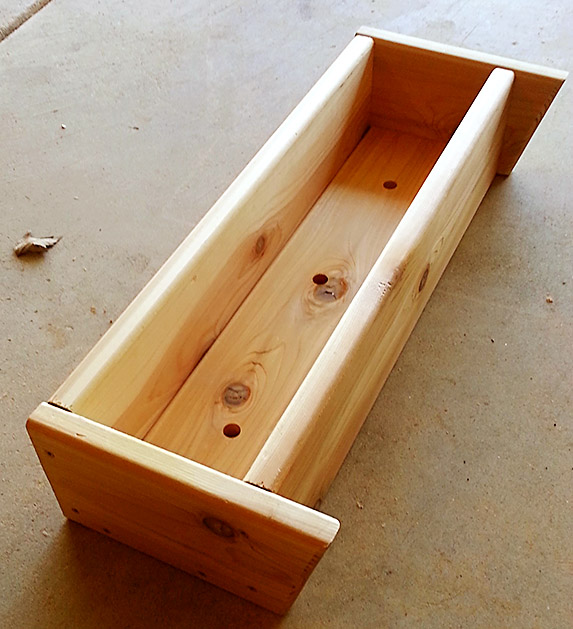
A completed planter box, it has 3 3/4 inch holes drilled for drainage, and a 1/8 inch gap either side of the flush base. My design principles required that no fixings (screw heads) were visible from the front.
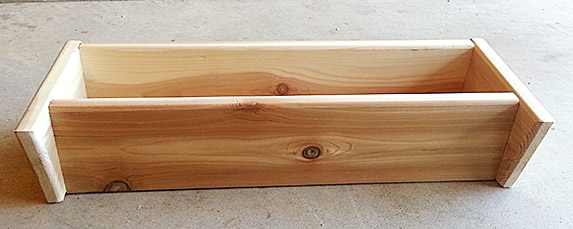
I added the tapered sides just to make each box look less boring.
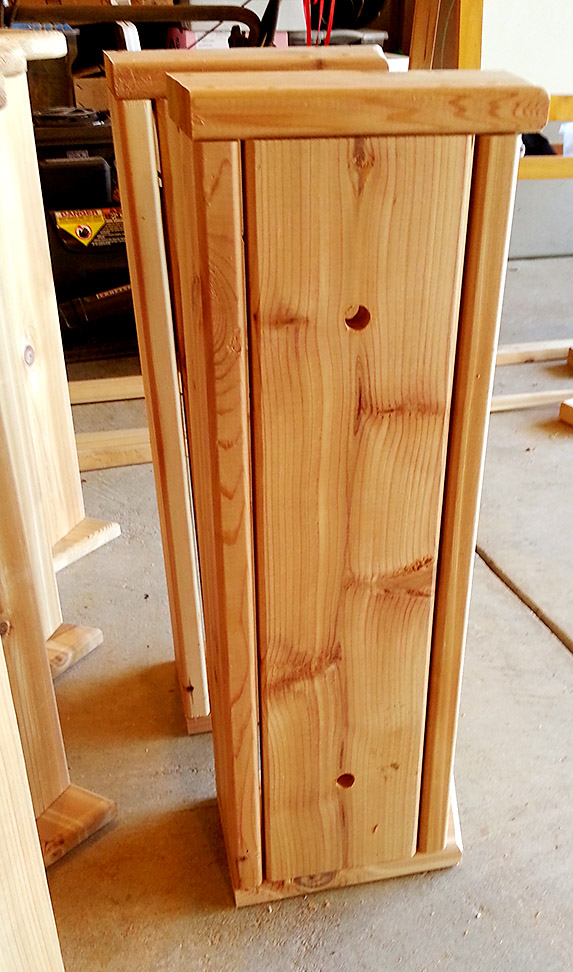
The underneath of a box with drainage holes and gaps.
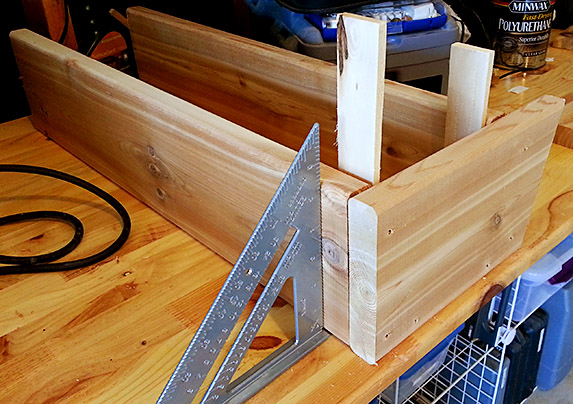
Temporary jig set up to make the front and back true. Two wooden shims cut at the correct height enforces a consistent drainage gap each side of the base plank. I also used a card template to make the six screws on each of the side pieces consistently positioned.
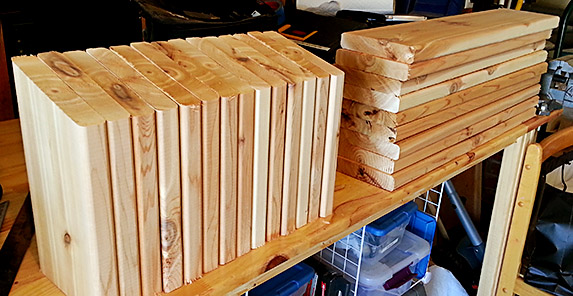
The design calls for eight boxes. I made one complete one first, then set out to construct seven more. Cutting didn't take long once I got going.
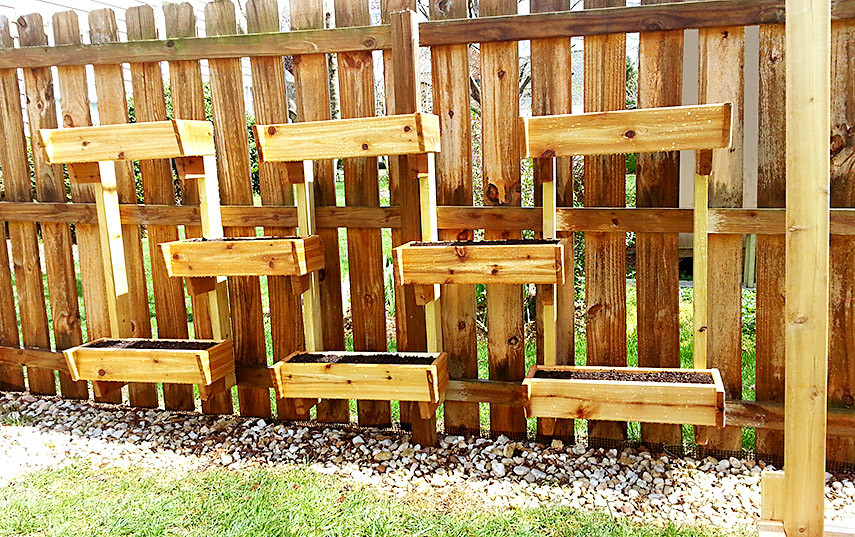
Mounting this was tricky... my aspirations for no screws to show from the front meant that I had to pre-build the entire thing (screwing in from the rear of the verticals into the tapered box supports) and mount it onto the fence in one go. I stood it on bricks and soil bags then used Bungee cords to hold it onto the fence whilst I leveled each vertical, and attached them to the fence from the back.
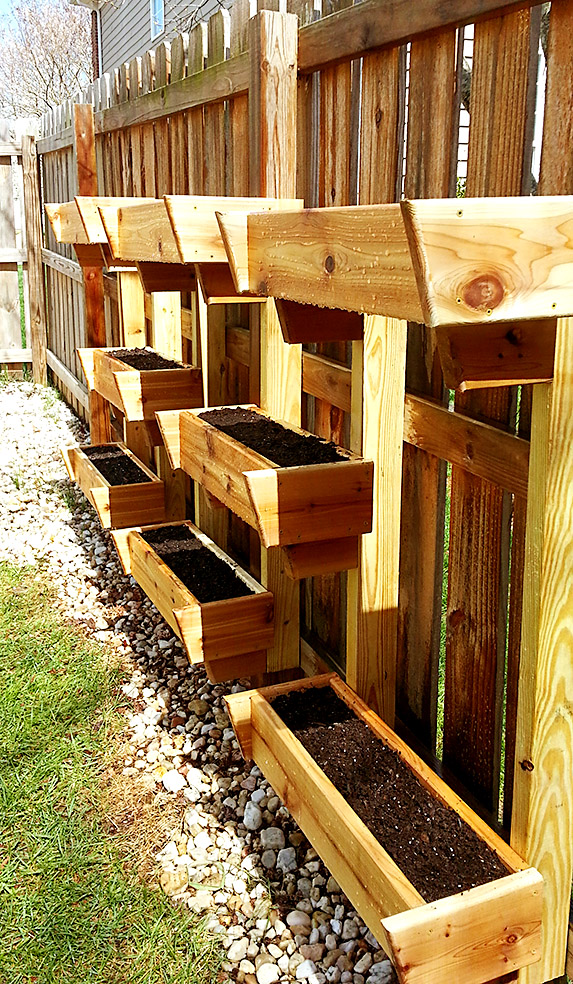
From the right, you can see the supports which were tapered blocks with chamfered edges to match the angles set by the boxes. The stock I used was mostly round-edged from the store but any external edges created by cuts were rounded on the router prior to assembly.
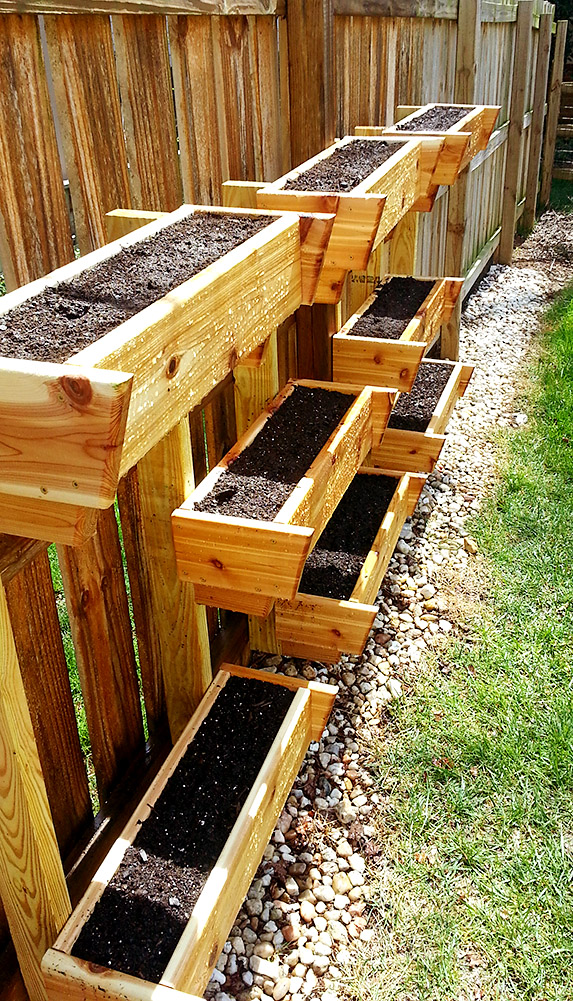
And another view from of left side. Fixed, filled and ready for planting.